Flashing a tune
Write a Nizpro calibration to a detected ECU. Desktop client, for DIY and dealer accounts.
In this guide
Before you flash
- Detect the ECU first, so the client knows what it is and the Detected ECU panel is filled in. See Detecting an ECU.
- Your programmer needs to be ready: a green readiness light with the voltage in range. See the Desktop client interface overview.
- Flashing writes a calibration to the ECU. A first flash and a cross-flash each use one credit from the tune's licence group. A same-group re-flash is free.
- If the ECU carries a legacy Woolich / WRT licence, see Legacy Woolich / WRT ECUs before you flash.
Start a flash
Once an ECU is detected and can be written, the Main Panel shows the Write ECU button. For a new, unlicensed ECU the banner reads "New (unlicensed) ECU detected. Select Write ECU to perform a new flash."
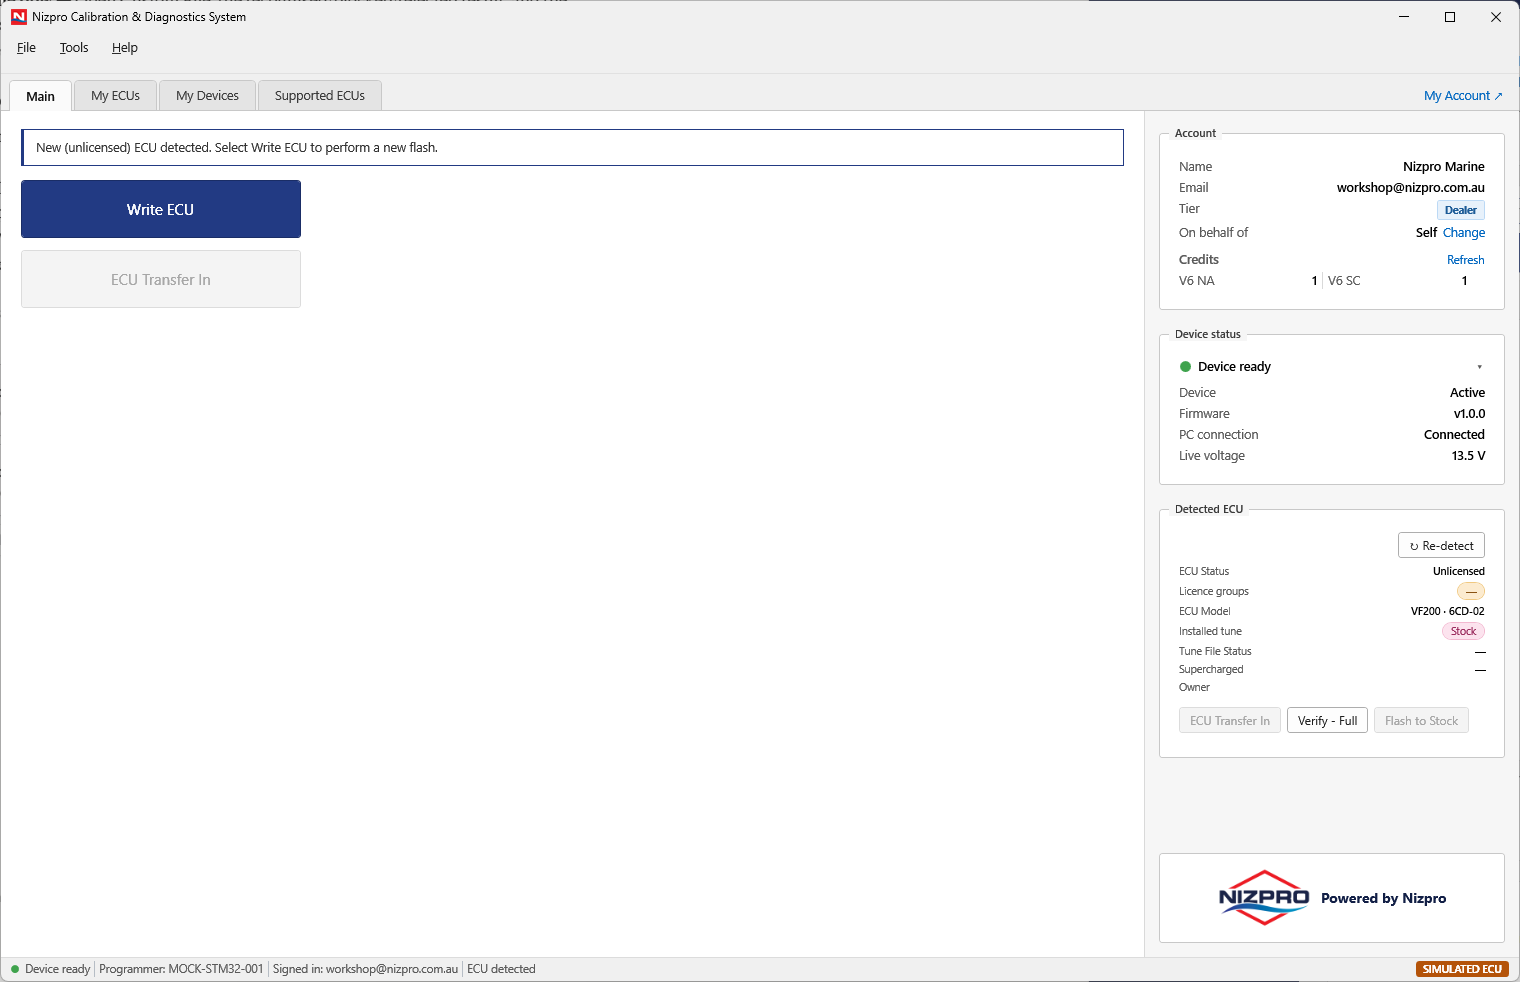
Press Write ECU to open the tune picker.
Pick a tune
The picker lists the writable tunes for the detected ECU. Stock is never listed here: to put an ECU back to stock you use Flash to Stock or Return to Stock, covered in their own guide.
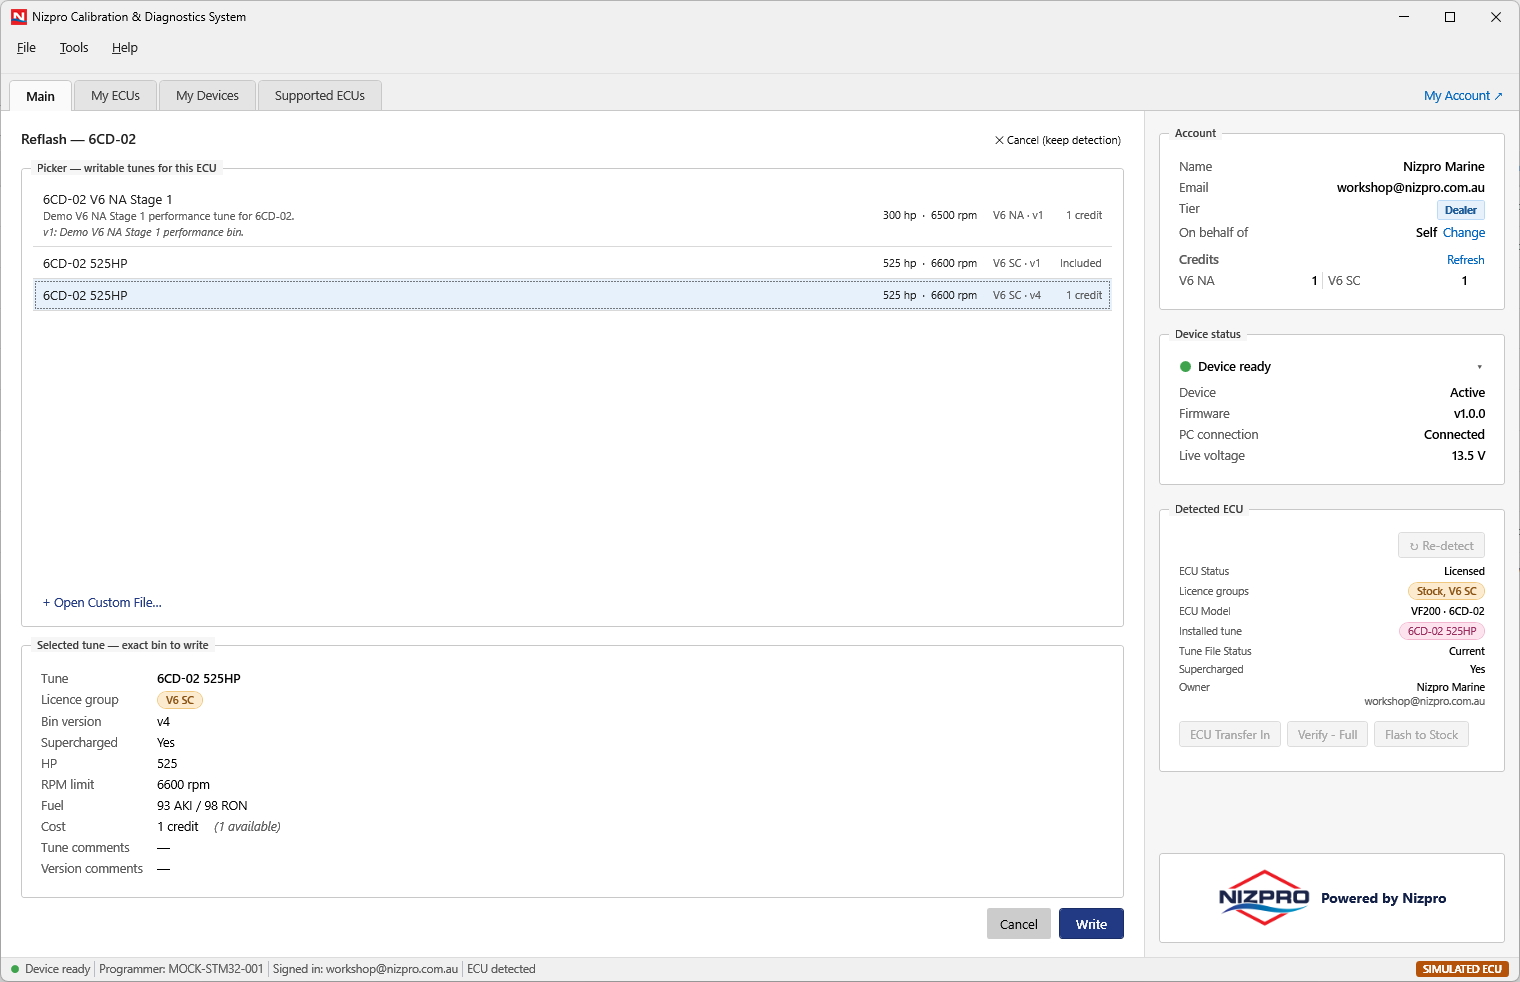
The Selected tune area shows the exact bin that will be written: the tune, its licence group, bin version, whether it's supercharged, HP, RPM limit, fuel, and the credit cost.
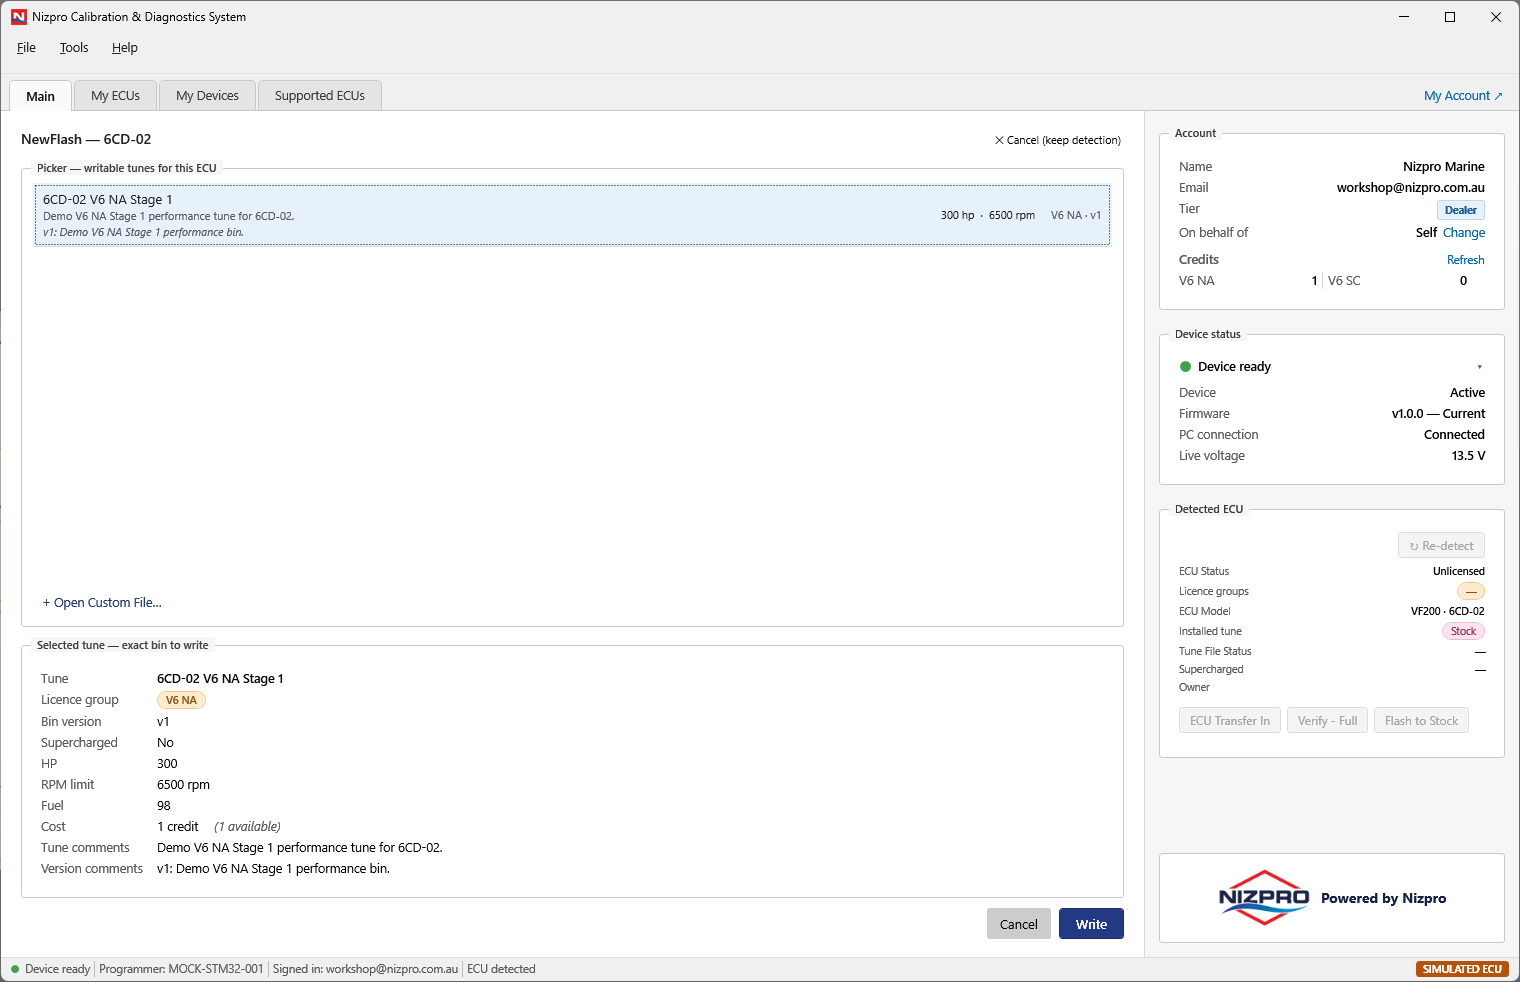
Select a tune, then press Write. Dealers also see Open Custom File at the bottom of the list, covered further down.
New Flash: the first flash of an unlicensed ECU
A New Flash is the first flash of an unlicensed ECU. It assigns ownership and uses one credit from the tune's licence group.
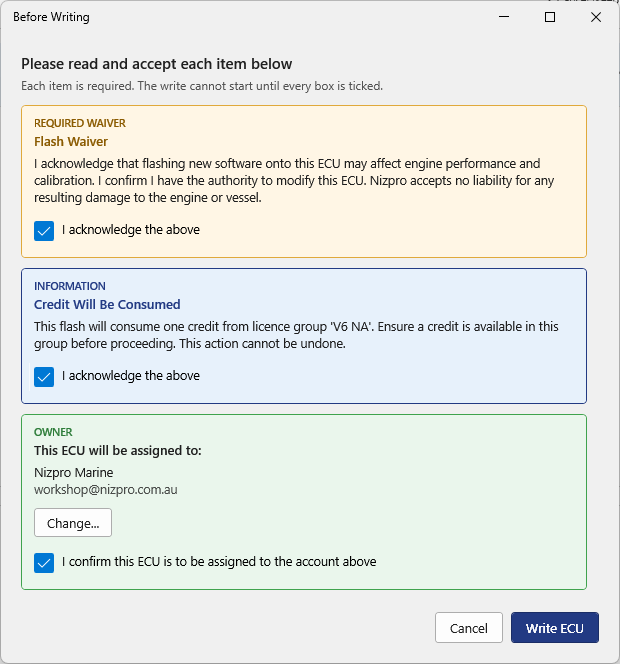
Before the flash starts, the Before Writing screen appears. It lists everything you have to read and tick, and the write can't start until every box is ticked: the Flash Waiver, a note that a credit will be consumed, and the owner the ECU will be assigned to. If the tune is for a supercharged engine, you'll also see the Supercharged Engine Waiver (see Supercharger tunes, below).
Confirming the owner
The Owner section shows the account the ECU will be assigned to. On a dealer account this is whoever you nominated when you detected the ECU. Confirm it by ticking "I confirm this ECU is to be assigned to the account above", or use Change to set a different owner. On a DIY account the owner is always you.
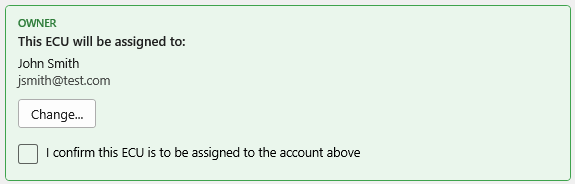
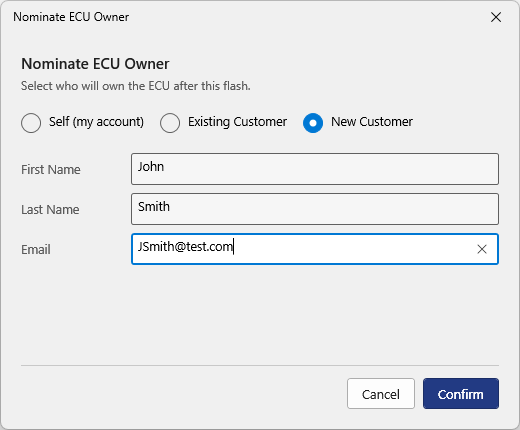
Change opens Nominate ECU Owner, where you pick Self, an existing customer, or a new customer you create here.
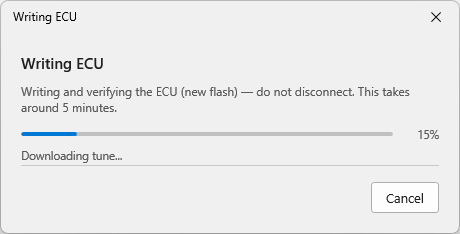
Once every item is ticked, press Write ECU. The client writes and verifies the ECU. Do not disconnect while it runs.
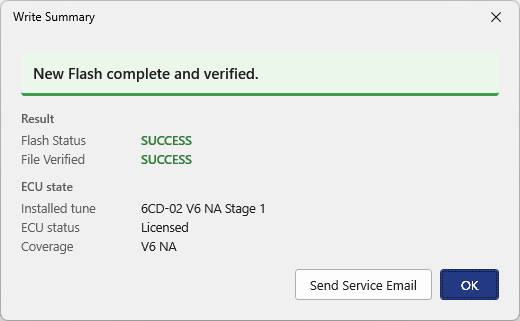
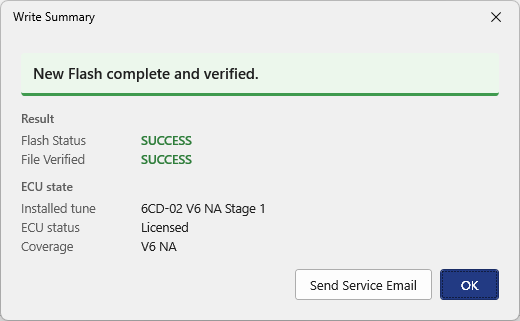
When it finishes, the Write Summary shows the result. If you flashed on behalf of a customer, you can email them a service notification straight from here with Send Service Email, or later from My ECUs (see below).
Re-flash and cross-flash: an already-licensed ECU
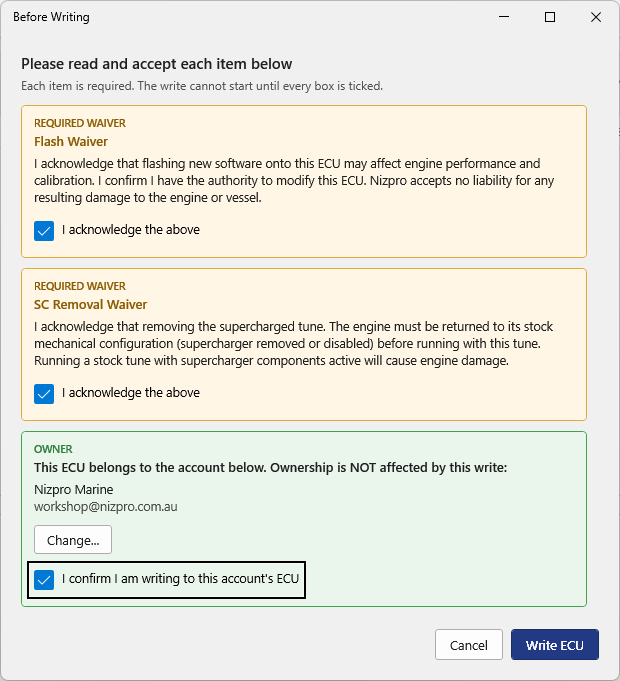
On an ECU that already holds a licence, writing another catalogue tune is a re-flash or a cross-flash. By default, neither changes ownership. The Before Writing screen's Owner section confirms this: "This ECU belongs to the account below. Ownership is NOT affected by this write." You confirm it by ticking "I confirm I am writing to this account's ECU".
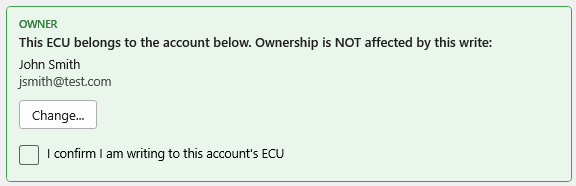
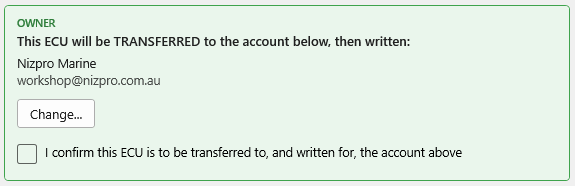
Changing ownership. You can still use Change to assign the ECU to a different account as part of the write. If you do, the Owner section updates to say the ECU will be transferred to that account, then written, and you confirm that instead.
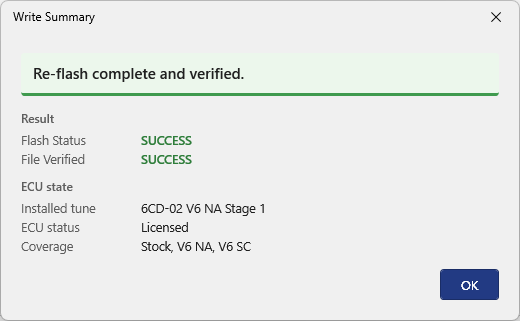
Re-flash
A re-flash writes a tune in a licence group the ECU already holds. It's free, and coverage doesn't change.
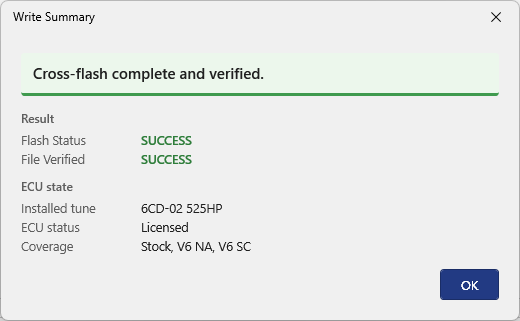
Cross-flash
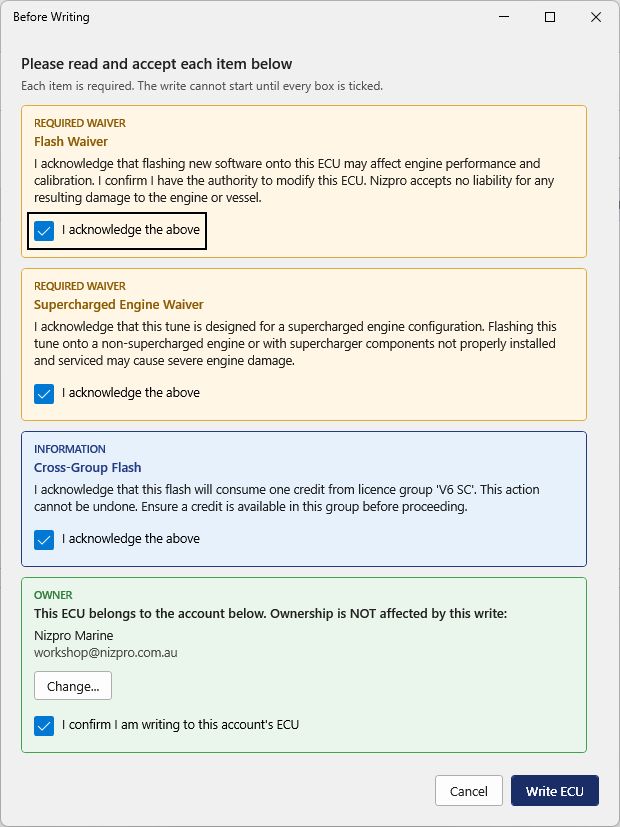
A cross-flash writes a tune in a licence group the ECU doesn't hold yet. It adds that group to the ECU's coverage and uses one credit from it, so the Before Writing dialog includes a Cross-Group Flash item naming the group. The example below is a cross-flash to a supercharged tune, so it also carries the Supercharged Engine Waiver.
Supercharger tunes
Some tunes involve the supercharger, so you may see an extra waiver in the Before Writing dialog:
- the Supercharged Engine Waiver, when the tune you're writing is for a supercharged engine (shown in the cross-flash example above), and
- the SC Removal Waiver, when you're moving off a supercharged tune to a non-supercharged one.
Writing a custom file (dealers)
Dealers can flash a calibration from a local file instead of the catalogue, using Open Custom File at the bottom of the picker. This is how an experimental or one-off Nizpro bin file is written.
The client checks the file is a genuine Nizpro calibration. If it recognises the file, its detail appears in the Selected tune area, just like a catalogue tune, and you can write it.
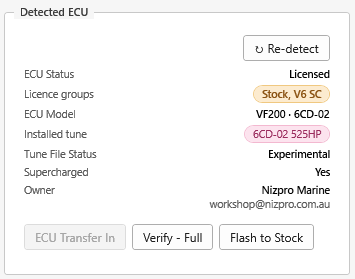
After the write, the Detected ECU panel shows the installed tune with its Tune File Status, for example Experimental for a development bin.
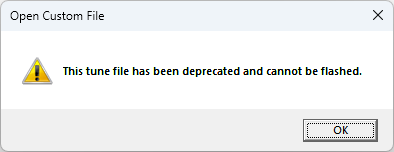
Not every file can be written:
- a deprecated calibration can't be flashed,
- a stock or unprogrammed file is rejected here (use Flash to Stock or Return to Stock instead), and
- a file that isn't a genuine Nizpro calibration, or has been modified, is rejected.
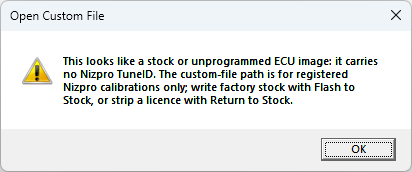
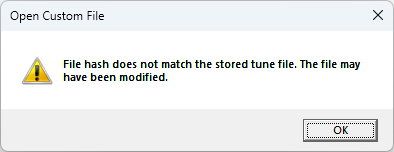
If the write does not verify
Every write checks itself by reading the ECU back. If the read-back doesn't match, the write stops and the Verification Failed dialog appears. It tells you the ECU was written but the read-back didn't match, warns you not to start the engine, and asks you to check the battery and the connections before choosing whether to write it again.
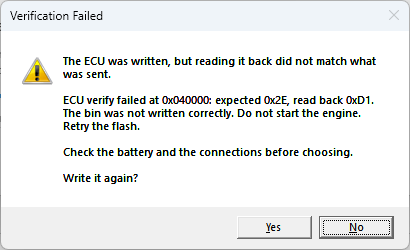
Choose Yes to retry the flash. A clean re-write usually verifies.
If the retry also fails, the Write Summary shows the failed result and the ECU's data is sent to Nizpro automatically. The ECU is locked and marked as pending Nizpro, with its coverage showing as none.
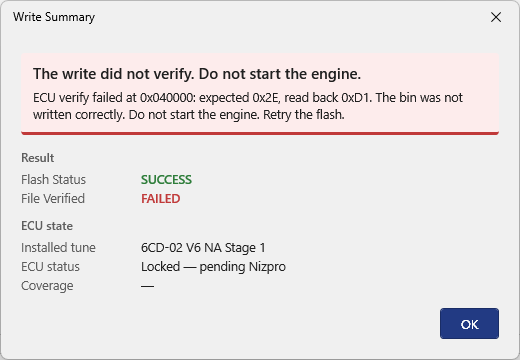
Nizpro reviews the ECU and restores it to its correct licensed state. Your licence for that ECU is not lost: it stays on record, so once Nizpro has restored the ECU you can flash it as normal.
Emails to the owner (dealers)
From the desktop client, you can email the owner of a customer's ECU: a service notification after a flash, or a fresh activation link if they haven't set up their account yet. Both are discretionary and never sent automatically.
Send a service email
After a verified write on a customer's ECU, you can email the owner a service notification with the facts from the last successful flash.
You can send it two ways. The first is straight from the Write Summary at the end of the flash, using Send Service Email.
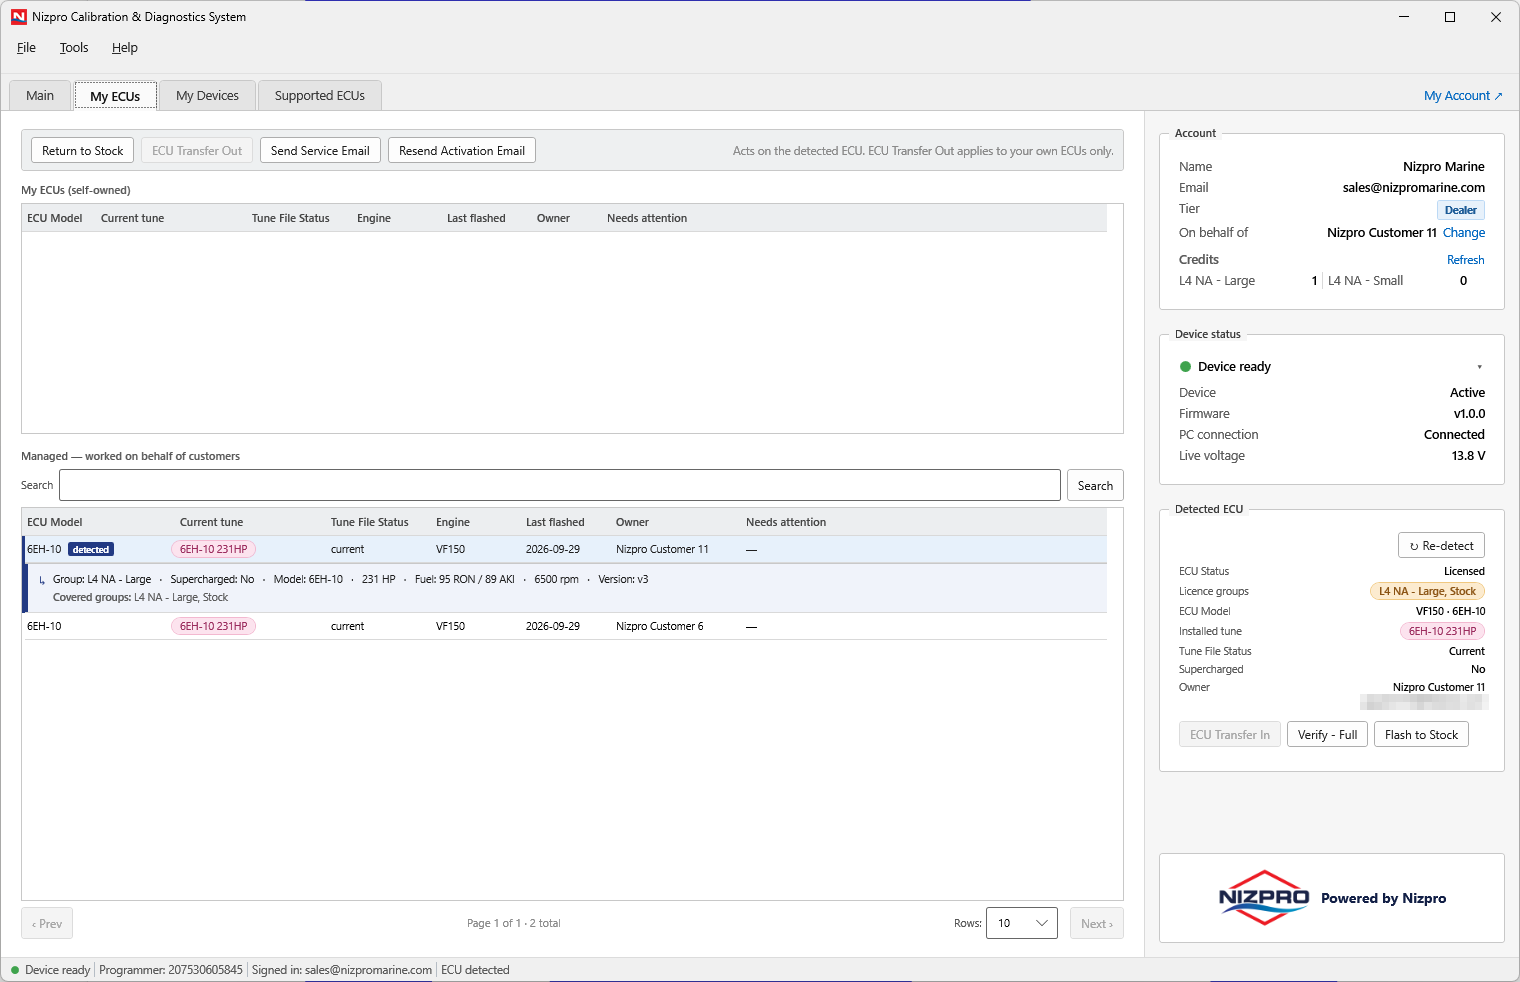
The second is later, from the My ECUs tab: select the customer's ECU, then click Send Service Email.
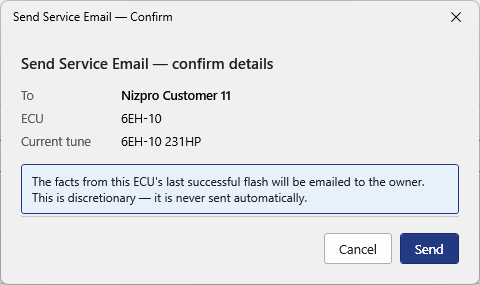
Either way, check the details, then click Send.
From My ECUs, the toolbar then confirms Service email sent to the owner.

Resend the activation email
If the owner of a customer's ECU hasn't activated their NCDS account yet, you can send them a fresh activation link, for example if they can't find the first email. The link opens the page where they set their password (see Creating and managing your account).
- In the My ECUs tab, select the customer's ECU, then click Resend Activation Email.
- Resend Activation Email shows the owner, the ECU and its current tune, and says a fresh account-claim link will be emailed to the owner. Click Send, or Cancel to stop.
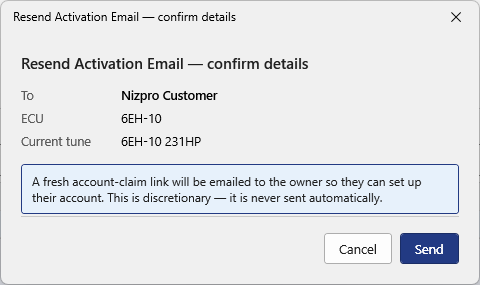
Resend Activation Email: confirm the details, then Send. - The toolbar confirms Activation email sent to the owner of the ECU.

Activation email sent to the owner of 6EH-10.